")
")
Creating and Linking Event Schedules and Event Segments
Modules Event SegmentsM and Event ScheduleM
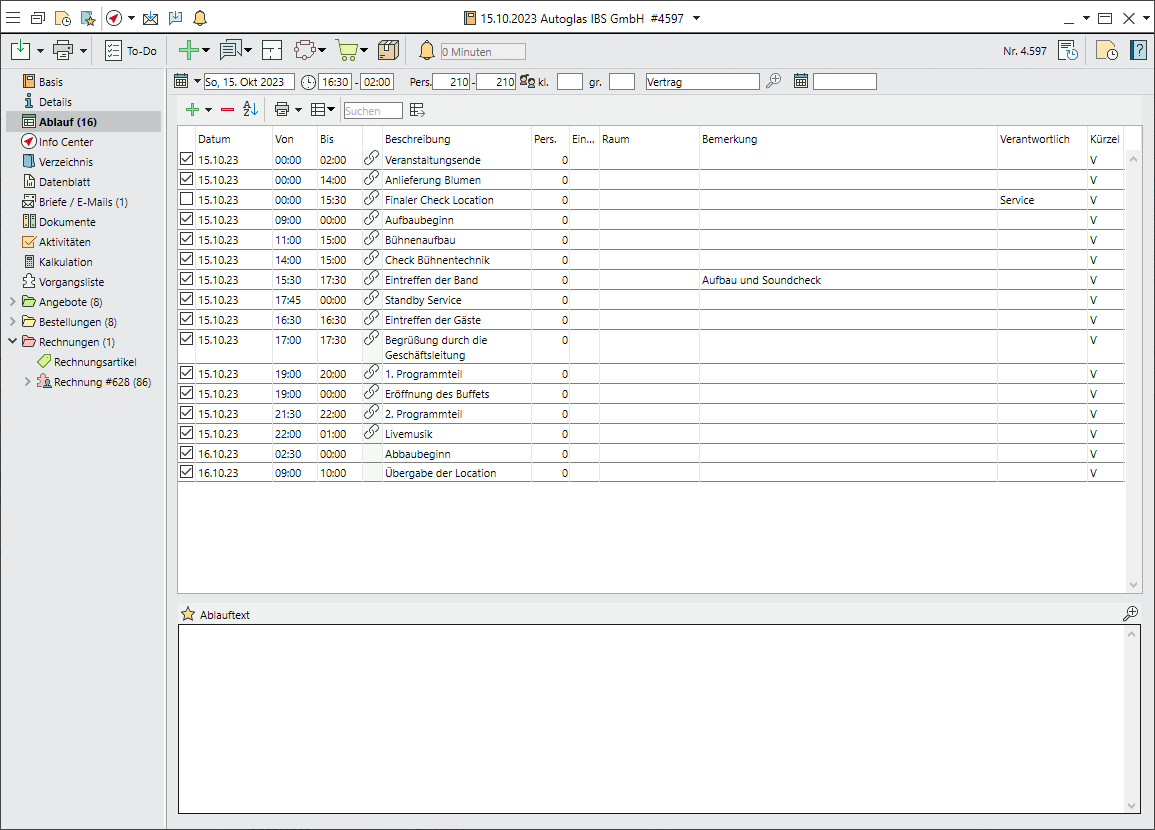
Create a schedule
- In the side navigation, go to the
 Schedule tab.
  Add new schedule items.
- The date field is preset to the event date for one-day events and to "daily" for multi-day eventsM. Change the date by selecting a day from the picklist or entering a date manually.
- To change multiple schedule items at the same time, select the items by holding down the Ctrl key and left-clicking. Then right-click in the column you want to change. Click on Adjust and enter the change in the input mask. All selected lines are automatically updated.
- Every new schedule item marked with a tick in the first column as "external information" will automatically appear on customer prints.
- To mark the item as "in-house information", remove the tick in the first column. The item will then only appear on in-house prints.
Enter schedule items
- Enter the From and To times.
- Enter a Description of the schedule item from the expandable picklist or manually.
- Enter the Number of guest if this differs from the main event.
- Select a room from the picklist. Only rooms booked for the event on the General tab will show here.
- Add further Remarks as needed.
 Save your input by clicking on the icon in the top left-hand corner of the input window.
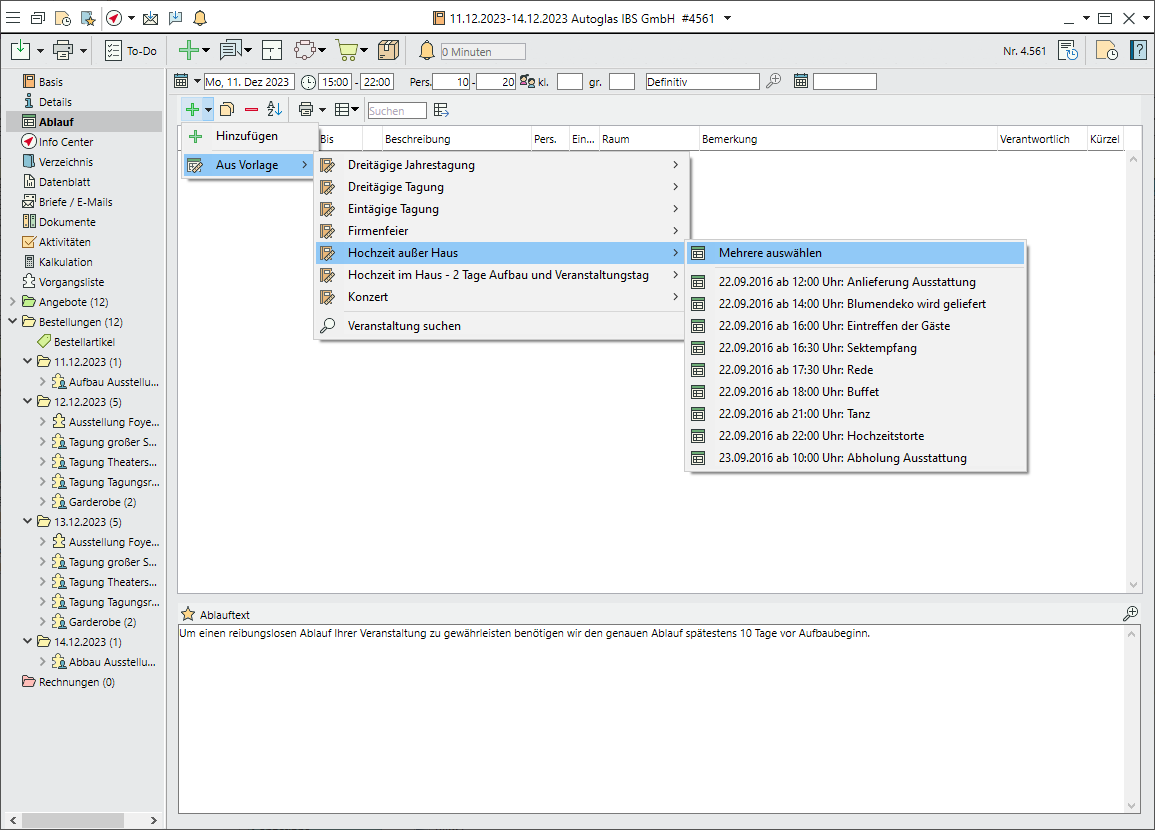
Create an event schedule from a template
- Open the
 Schedule in the side navigation.
 - Go to
 >
>  From template to open a selection of existing
  Event templates with event schedules.
 - Click on Select multiple to copy one or more items.
- Individual schedule items can be subsequently marked and
 Removed.
Link a scheduleM to event segmentsM
- Double-click on
 Link to link an existing
  Quote or
  Order to a specific schedule item. The icon will change to or respectively.
 - Left-click
 to open a text field containing the segment name and some details.
 - Right-click the "Quote" (or Order) and select
 Open event segment for editing.
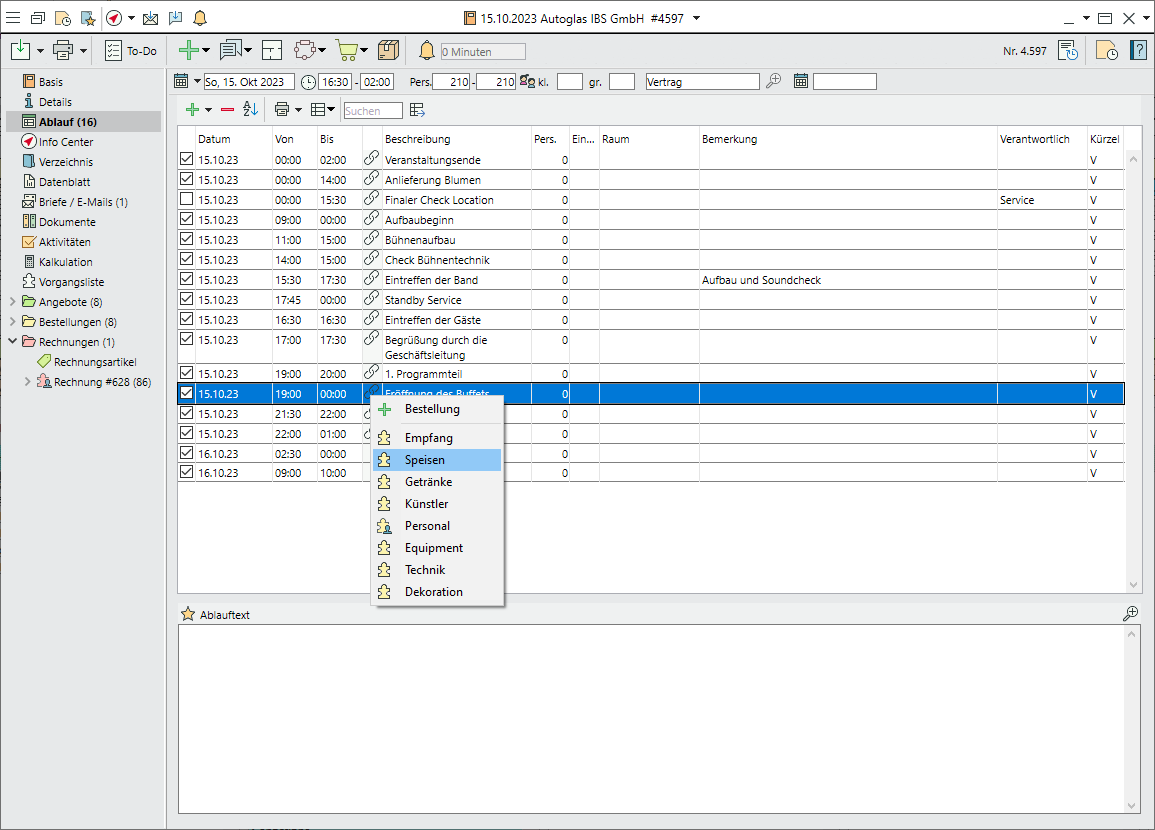
Create an event segment in the schedule
- Right-click on Link > Quote or Sales Order.
Note: Once an order has been created, new quotes are no longer available for linking. - Enter the Name of the new event segment in the dialogue window. The name defaults to the description of the linked schedule item.
- Click OK to confirm and to open the new segment.
- Save your input by clicking on the icon in the top left-hand corner of the input window.
- The symbol
 changes to or
  .
.
Change data for a linked segment
- Change data such as the date, times or rooms in the Segment.
Note: The segment times must lie within the event times, whereas in the schedule, the times can also lie outside the entered period. - Save your input by clicking on the icon in the top left-hand corner of the input window.
- The schedule is updated automatically.
Reject a linked segment
- In the side navigation, go to the General tab of the segment.
- At the top of the input window, select Rejected as the segment status. Confirm the prompt by clicking on Reject.
- To delete the schedule item as well, select Delete schedule item.
- To remove only the link and retain the schedule item, select Break link.
- Save your input by clicking on the icon in the top left-hand corner of the input window.
Remove links
- In the schedule, right-click on Quote and select Break link to remove the link between the item and the segment.
- Both the schedule item and the event segment will remain unchanged.
- Save your input by clicking on the icon in the top left-hand corner of the input window.