")
")
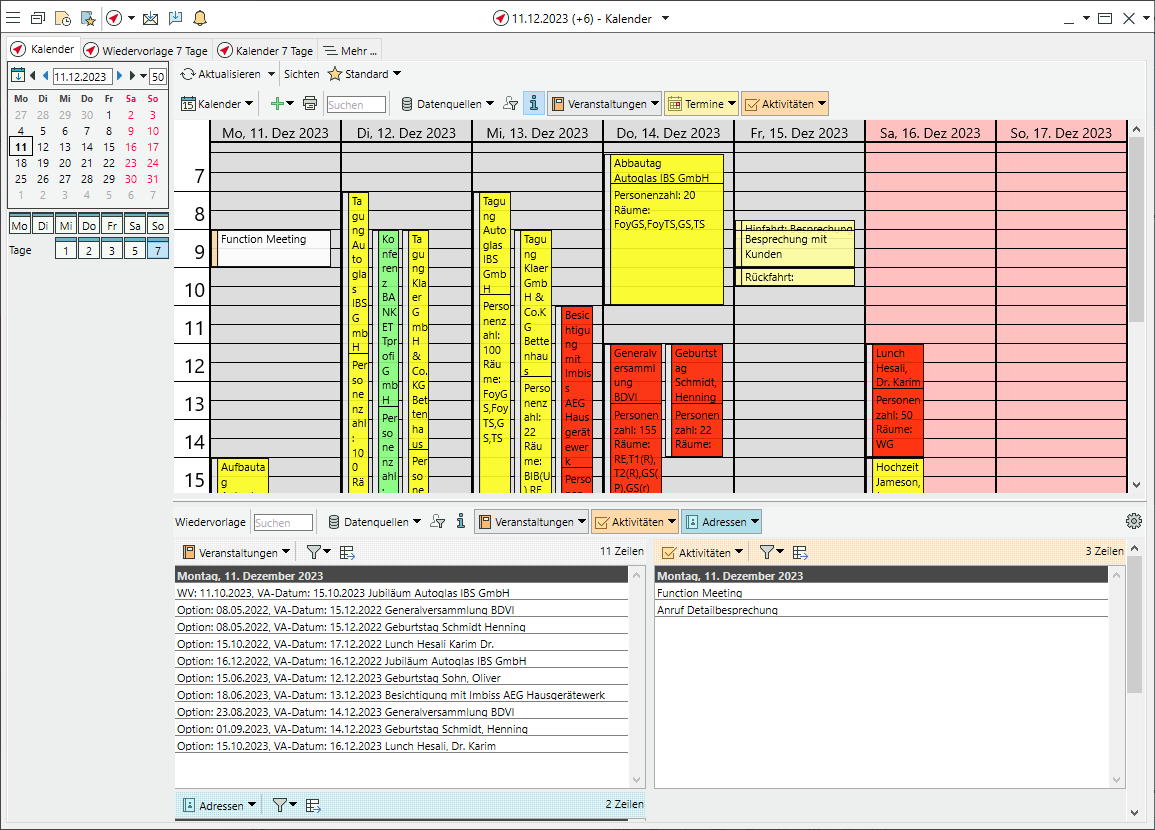
Manage the calendar, tasks and appointments
Selecting views for calendars and follow-ups
- Left-click the
 Info Centre in the top left-hand corner of the quickpicks (F8).
 - Select a calendar view (p.ex.
 Calendar,
  List, or
  Timeline with headers).
Note: There is only one view available for follow-ups. - Below the date selection, specify the number of days and the days of the week that you want to see.
- Control the size of the calendar and follow-ups windows by holding down the left mouse button and dragging on the splitter in the middle of the window.
Filter data for calendars and follow-ups
- Hold down the Ctrl key and left-click to select one or more
 Data sources for the calendar (p.ex. events, appointmentsM, tasks).
 - The Data sources for the Follow-ups are set in the bottom part of the window independently of the calender (p.ex. AccountsM, Mail, Tasks, WorkflowsM).
- The selected data sources will appear as additional tabs in the toolbar. Click on each to select further lists or set individual filters.
- Filter for your
 Own data only as needed.
 - Save the current settings under Views >
 Save >
  New as
  User view,
  Group view or
  Standard view.
 - Click on
 More > New to add other important data sources (evaluation lists, web addresses, etc.) as tabs to the Info Centre.
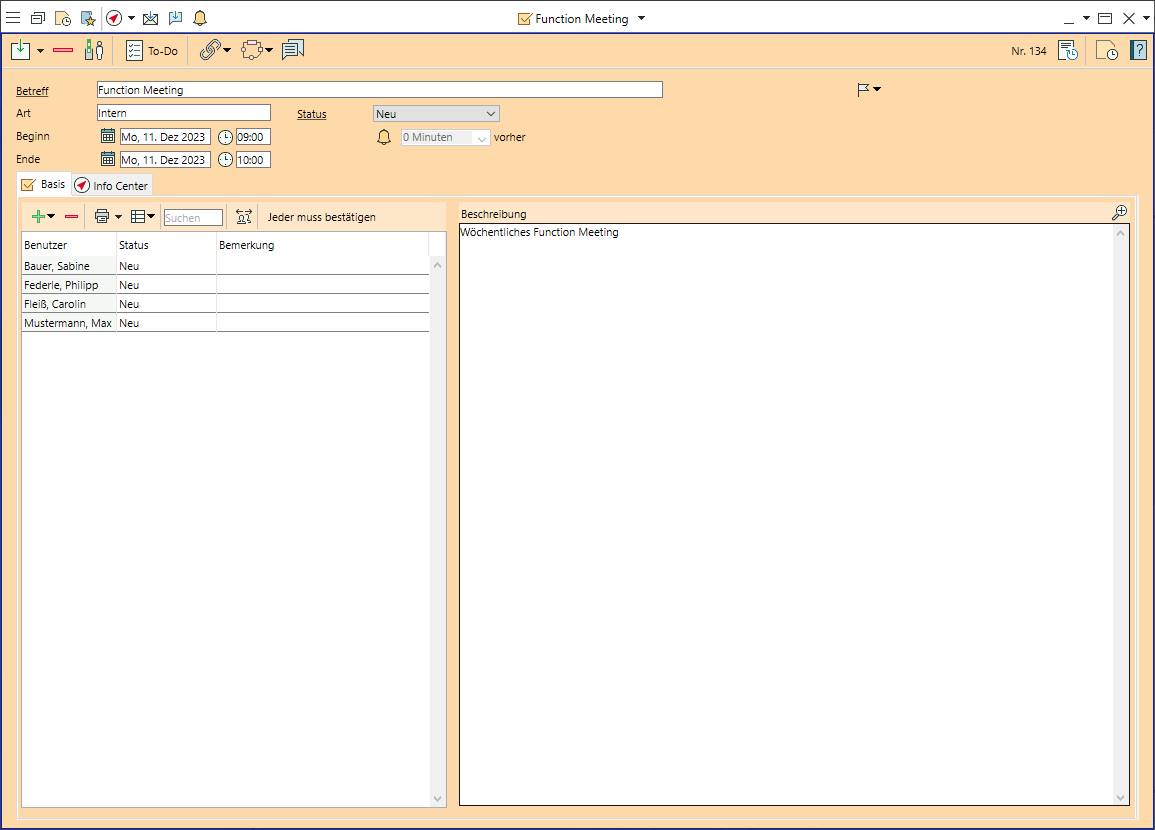
Create a task
- Go to the
 Home tab and select
  Tasks > New.
 - Enter the Subject and activate a
 Reminder if necessary. Tasks without reminders are only displayed in the calendar (with date) or follow-ups (without date) if the user has set tasks as a data source .
 - Select one or more responsible Bp event users or user groups.
- The task wil be displayed until it is confirmed by right-clicking in the calendar or marked as completed in the Reminders window .
- Expand user groups if every member of the group is meant to take action for this task.
- Link the task to an accountM, event or other record.
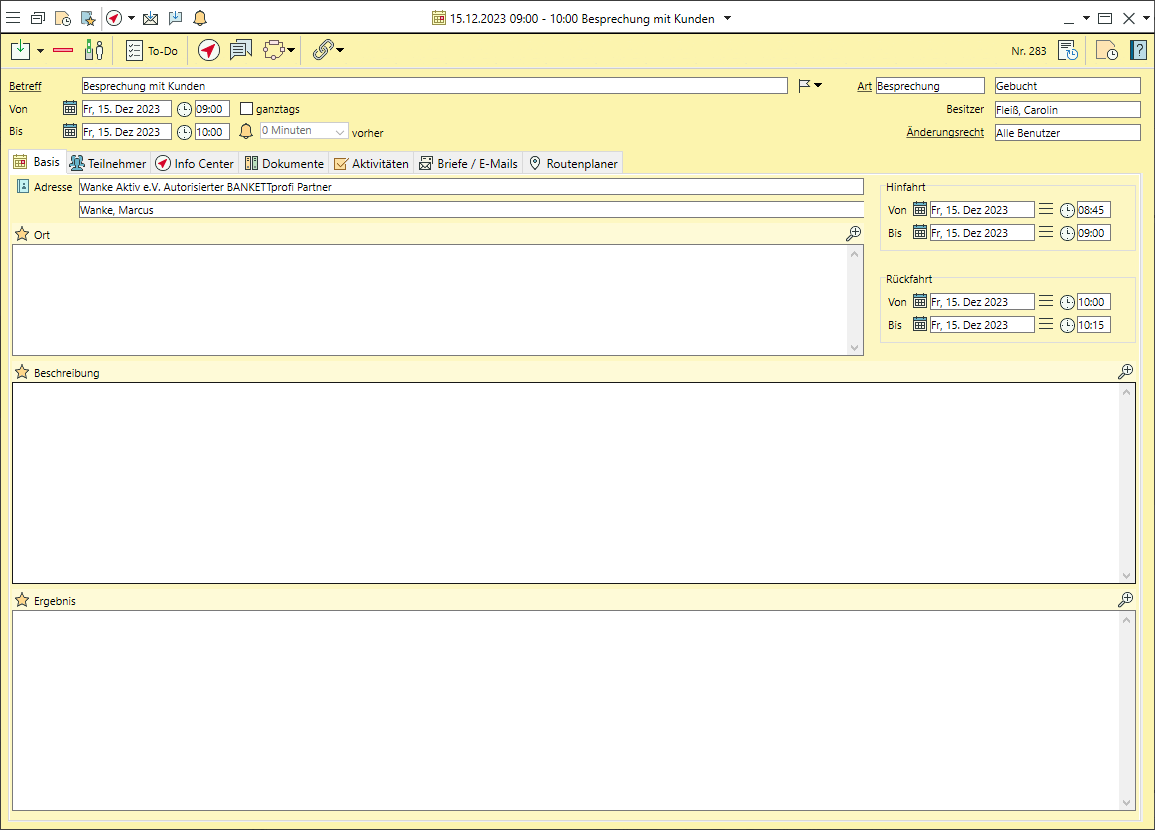
Create an appointmentM
- Go to the Home tab and select
 Appointments > New or create appointments directly from an address or event.
 - Enter the Subject, the Type and the Date of the appointment and activate a Reminder if necessary.
- The appointment will appear in the calendar of all invited Bp event users if Appointments is selected as Data source .
- Confirm your participation by right-clicking on the date in the calendar or in the subject of the invitation.
- Link the appointment to an
 Event if necessary.
 - For appointments away from your place of work, enter the date and time for the outward and return journey if necessary.
Invite participants to an appointmentM
- Go to the
 Participants tab.
 - Add staff membersM who have access to Bp Event in the list of Users.
- Send an
 Internal Message (directly above the list) to invite people on the list.
 - Add others who have an account in Bp Event in the list of Participants.
 Email (directly above the list) an invitation to the people on the list.
- Enter any participants who are not recorded in the database in the Other participants list.
- Go to the Mail / Email tab to invite people to the appointment and select the email addresses manually.
Modules: Appointments, CRM plus, Workflow Management