")
")
Training material 2025 / 2026
Tutorial 2
Creating a bulk mail

Performance level: Beginner
Time needed approx. 30 to 40 minutes
The exercise can be interrupted and saved at any point.
Start Bp Event and log in as
User: Carolin
Password: cf
Carolin Fixit works in the Banqueting department of a private hotel. This year, the hotel is celebrating its 50th anniversary. An anniversary campaign with a varied programme is in the making, with invitations for all regular customers. Carolin is now creating a mail merge template that will be used to send an anniversary mailing to all regular customers.
The database references ensure that the recipient is addressed personally.
Training objectives:
- Creating a bulk mail template
- Selecting accounts
- Assigning and printing bulk mail
Objective 1 Creating a bulk mail template
On completion of this excercise, you will have copied an existing text template and inserted your advertising copy.
Carolin received the following text from the advertising agency by email:
50 Years of Hosting with a Passion - A Special Occasion to Celebrate
To mark this occasion, we would like to invite you to a week of celebrations. Join us for a varied social programme for all age groups, as well as a lavish dance in our Ballroom on Saturday, DD/MM/YYYY.
Visit our website and register in good time using the web form to reserve the table and rooms of your choice.
We look forward to seeing you!
1. Copy an existing bulk mail template
Database references are used in mail templates to ensure that a bulk mail, a mail merge or a newsletter does not start with an impersonal "Dear Sir or Madam", or that only the company account is shown instead of the actual sender. The refences will be replaced by the relevant data from the database. For the sake of simplicity, we will use a copy of an existing template in this exercise and customise it.
- Click on
 in the top left-hand corner of any window to open the function bar.
 - Go to the tab
 Templates and click on
  Text templates. The template search opens.
 - Click on Group/Type and select Bulk mail, then
 Confirm the selection and click on
  Search. A list of bulk mail templates will open.
 - Left-click the template Mailing cold accounts for party service.
- Click in
 Copy in the toolbar to open a copy of the template.

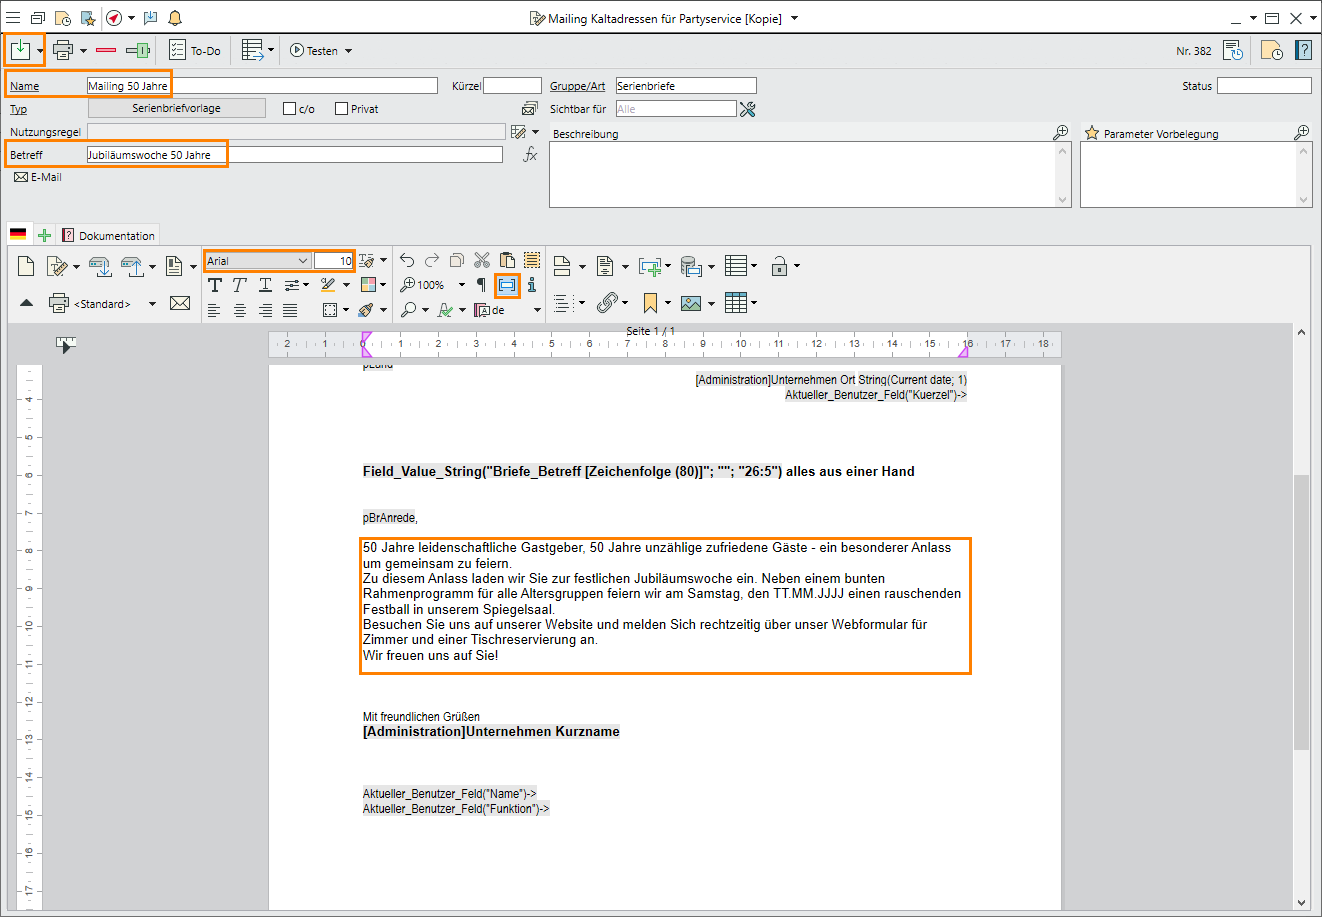
2. Customise the data
- Change the Name of the template to "Mailing 50 Years".
- Change the Subject to "Celebrating 50 Years".
- Place your cursor in the text field, then click on
 References in the middle of the input window. The references are highlighted in grey in the text and must not be changed.
 - Copy the text from the advertising agency.
- Paste the text into the templates by selecting the existing text between the salutation and greeting formulas and pasting the copied text using the Ctrl+V hotkey.
- Review the layout and set breaks if necessary.
 Save and close the template.
Objective 2 Selecting accounts
On completion of this excercise, you will have selected the private accounts of all regular customers who are to receive the mailing.
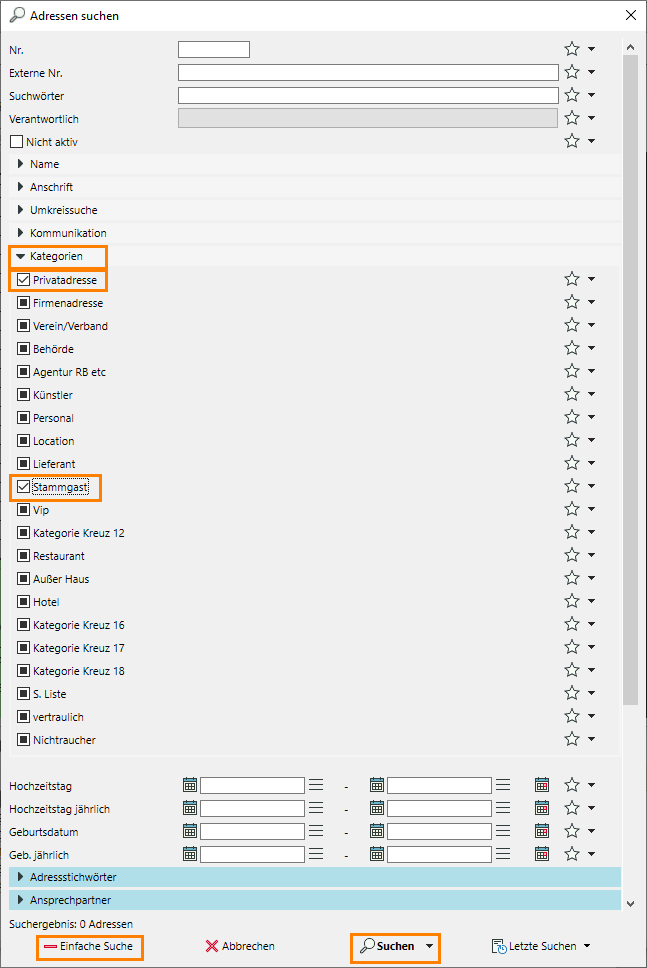
Search for accounts
- Go to the
 Home tab on the function bar and click on
  Accounts. The account search opens.
Alternatively, use the keyboard shortcut F10 to open the account search. - Click on
 Advanced search in the bottom left-hand corner.
 - Open the list of
 Categories and select Private customer as well as Regular customer, then click on Search.
 - A list of accounts with matching categories will open.
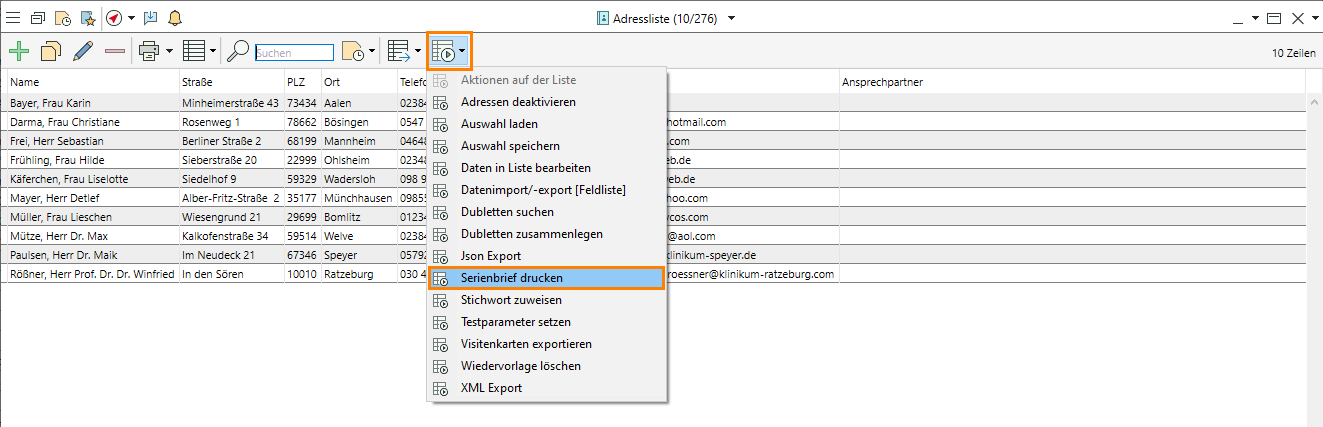
Objective 3 Printing bulk mails
On completion of this excercise, you will have printed a bulk mail for all accounts.
- Click on the dropdown triangle next to
 Bulk operations.
 - Select "Print bulk mail".
- Click on Templates >
 Selectin the search window. The list of available bulk mail templates opens.
 - Select the template Mailing 50 Years and confirm by clicking "OK".
- If necessary, set a keyword to easily identify the accounts which have received the mail later and confirm by clicking OK.
- For the purposes of this exercise, please confirm the message "Do you really want to print x letters?" by clicking Cancel.
Read more on Bulk mail
Objectives of Tutorial 2 achieved:
- Created a bulk mail template
- Selected accounts
- Assigned a bulk mail template and printed a mail merge
Congratulations!