")
")
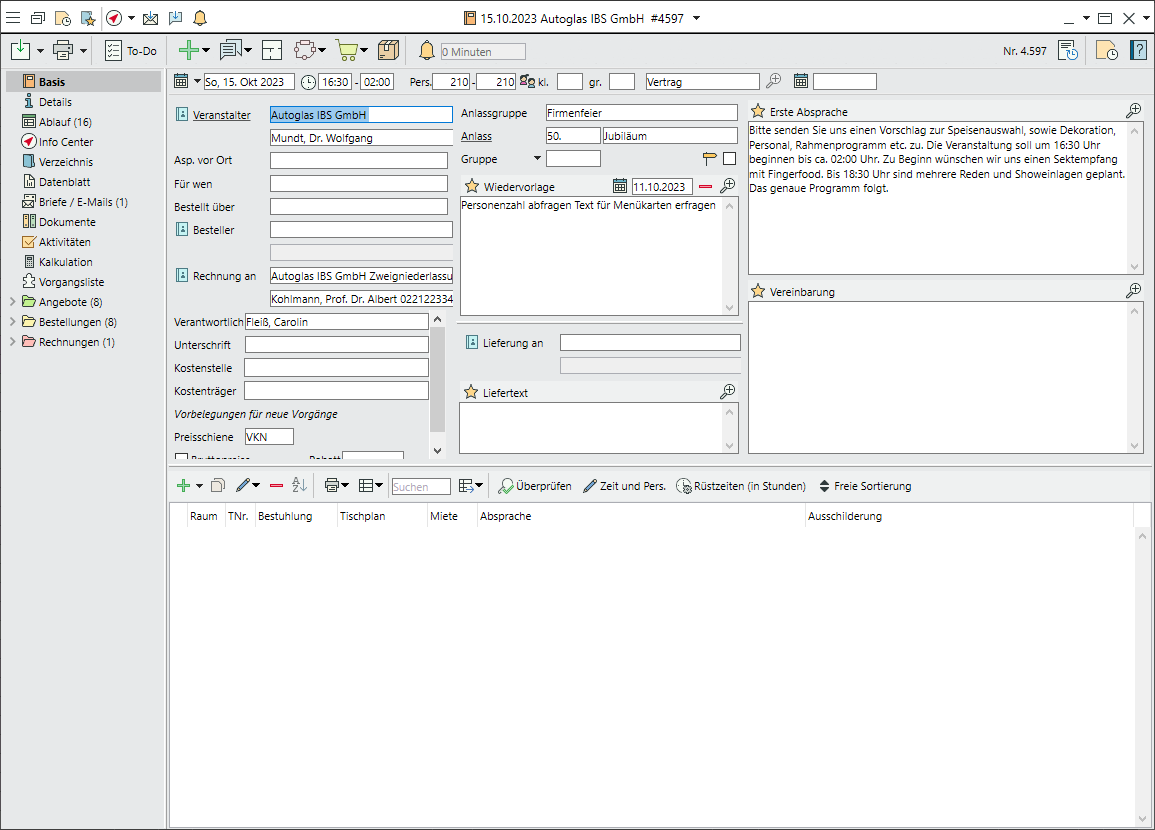
Creating and Using Events
Create an event
- Go to the
 Home tab and click on the expand triangle next to
 Events to select
  New.
New. - Select the
 New from template option for the kinds of events you use frequently.
 - Enter the Date, Start time and Number of guests. For as yet undated events, enter a reference date, then click on the expand triangle next to the
 Date picker and select
  Undated [date for reference only].
 - Assign a Status and Status date if applicabel (p.ex. hold date). The status and status date influence when, where and how the event is listed in the
 Info Centre and in the
  Room reservations .
 - Link existing or new accounts as
 Organiser and, if applicable, in the Ordered by or Invoice to fields.
 - Enter the name of the event in the Occasion field (p.ex. "Birthday").
- In the bottom half of the input window, select event Rooms by clicking
 Add >
Add >  Room list or Rooms reservations.
 - Alternatively, first check the availability of the rooms by clciking on Events > Room reservations and create a new event by double-clicking on the room you want.
- In the side navigation of the event, go to the
 ScheduleM tab to create a detailed timeline.
 - Richt-click on
 to link existing or create new event segmentsM.
View all linked records
- Go to the Info Center tab in the side navigation.
- Select your
 Data sources (p.ex. events, appointmentsM, mail).
 - Set additional
 Filters per data source or switch to other (custom) lists.
 - Filter for your
 Own data only as needed.
 - Save the current settings under Views >
 Save > New as
  User view,
  Group view or
  Standard view.
 - Click on New in the toolbar to create new records linked to this event. Only the type of data that is selected as data source will be available.
Create a quote for an event
- Right-click on
 Quote in the side navigation to create a New quote and enter a Name for that new event segment.
  Add any items you want to include in your quote (food and beverages, staff, rooms, technology, logistics, etc.).
- To add existing items to the quote, click on New >
 Search item.
 - To create an item on-the-fly, click on New >
 Item groups and select a group, then and enter the item name.
 - If you want to create that new item as a master item, confirm the following prompt by selecting New and save the new item. If the new component is meant to be only be available for this one event, select "One-off item".
- Right-click on the quote to create a
 New quote variant, in which the data from the existing quote is adopted but can be changed independently (p.ex. to offer a buffet instead of a seated dinner).
 - Organise your quoted items into multiple Quote segmentsM (p.ex. Staff, Food, A/V Support or Reception, Lunch, Coffee break) for the sake of clarity.
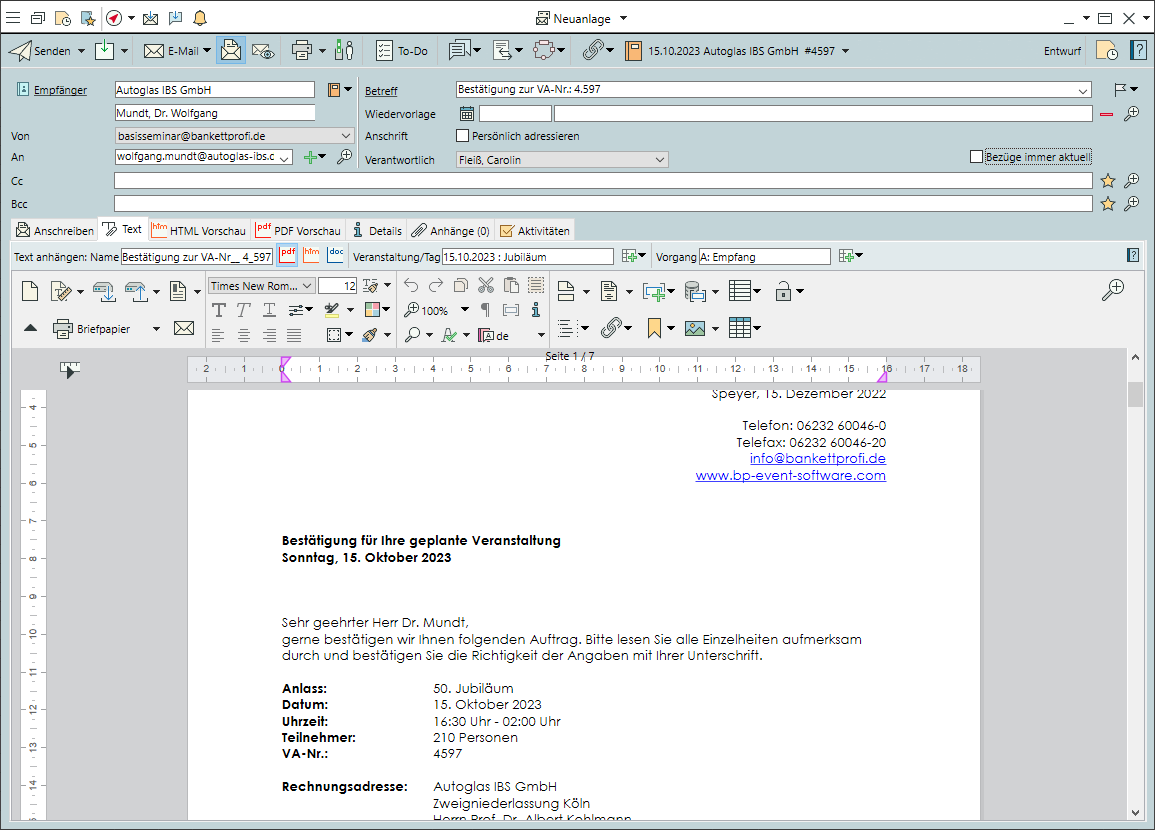
Print and/or send a quote
- In the toolbar, click on New >
 Mail > New to select a suitable
  Quote template, then change the type to
  Email if necessary
 - To send the quote as a PDF attachment with a cover letter, click on
 > Cover letter in the toolbar and select another Text template or write a customised text. The quote is automatically added as a PDF attachment.
  Send the quote.
Work with orders
- To convert the quote to an order, drag the Quotes folder onto the
 Orders folder with the left mouse button pressed down.
 - Change items, quantities, rooms, etc. as needed. This will not affect the original offer.
- Create
 Reservation listsM to assign individual tablesM or ticketsM.
 - Create
 Menu cardsM for food or drinks menus
Search for events
- Go to the Home tab and click on Events.
- Enter a time range and, if necessary, a search term (p.ex. event or organiser), then click on
 Search.
 - Checkboxes used for searches can have one of three possible states:
 selected,
  deselected or
  undefined.
 - If needed, access further detailed search options by opening the Advanced search.
Modules Event Schedule, Multiple Quotes and Orders, Appointments, Reservation Lists, Ticketing, Tabel Reservations